To make shorts smaller around the thighs, sew a new seam or use fabric tape. Another option is to take them to a tailor.
Finding shorts that fit perfectly can be challenging. Sometimes the waist fits well, but the thighs are too loose. This can affect both comfort and style. Fortunately, there are simple methods to adjust the fit around the thighs. Whether you prefer DIY solutions or professional help, resizing shorts can be quick and easy.
By making these adjustments, you can ensure your shorts offer a flattering fit. This guide will help you choose the best method to make your shorts fit better around the thighs, boosting both comfort and confidence.
Choosing The Right Shorts
Choosing the right shorts is essential if you want a perfect fit. You need to consider the fabric, fit, and style. This way, your shorts will be comfortable and stylish. Let’s explore these important factors.
Fabric Considerations
The fabric of your shorts plays a big role. Choose fabrics that are easy to alter. Cotton and denim are good choices. These fabrics can be adjusted without much hassle. Avoid fabrics that are too stretchy. Stretchy fabrics are hard to make smaller. They can lose their shape.
Fit And Style
The fit and style of your shorts are also important. Look for shorts with a relaxed fit. They are easier to alter. Slim-fit shorts might be trickier to adjust. Choose shorts with simple designs. Fewer details make the alteration process easier.
Here is a quick checklist for choosing the right shorts:
- Pick easy-to-alter fabrics like cotton or denim.
- Avoid stretchy fabrics that lose shape.
- Opt for relaxed-fit shorts for easy adjustments.
- Select simple designs for easier alterations.
Use this guide to help you find the perfect pair of shorts. With these tips, altering your shorts around the thighs will be a breeze.

Gathering Your Materials
Before you begin making your shorts smaller around the thighs, it’s important to gather all the necessary materials. Having the right tools and accessories at your disposal will make the process smoother and more efficient. This section will help you identify what you need to get started.
Essential Tools
- Measuring Tape: To measure your thighs and shorts accurately.
- Scissors: For cutting fabric or threads.
- Sewing Machine: To stitch the shorts after adjustments.
- Needles and Thread: For hand-sewing or finishing touches.
- Seam Ripper: To remove existing stitches.
- Chalk or Fabric Marker: For marking where to cut or sew.
- Iron and Ironing Board: To press seams and fabric.
Optional Accessories
- Elastic Bands: For adding elasticity to the thighs.
- Fabric Glue: For quick fixes without sewing.
- Pins and Clips: To hold fabric in place while sewing.
- Pattern Paper: For creating a template before cutting.
Measuring Your Thighs
To make your shorts fit better around the thighs, start by measuring your thighs. Accurate measurements ensure a better fit and comfort.
Finding Your Measurements
First, gather a measuring tape and a notepad.
- Stand straight with your legs slightly apart.
- Wrap the measuring tape around the fullest part of your thigh.
- Make sure the tape is snug but not too tight.
- Record the number where the tape meets.
Repeat this process for the other thigh to compare measurements.
Recording The Data
Keep track of your measurements in a table for easy reference.
| Thigh | Measurement (inches) |
|---|---|
| Right Thigh | ____ |
| Left Thigh | ____ |
Having this data helps you adjust your shorts accurately.
Follow these steps to ensure your shorts fit perfectly around your thighs. Accurate measurements are the key.
Marking The Adjustment Areas
To make your shorts smaller around the thighs, you need to mark the areas for adjustment. This helps in creating a precise fit. Careful marking ensures symmetry and balance. Using the right tools is essential for success. Below, we discuss two effective methods.
Using Chalk Or Pins
Chalk is an excellent tool for marking fabric. It’s visible and easy to remove. Draw a line where you need the adjustment. Ensure the line is straight and even.
Pins are another great option. Place pins along the adjustment line. This method is quick and holds the fabric in place. Use pins if you prefer a more tactile approach.
Both tools have their pros and cons. Choose based on your comfort and precision needs.
Ensuring Symmetry
Symmetry is crucial for a balanced look. Adjusting one side more than the other can ruin the fit. Use a ruler or measuring tape for accuracy.
Measure both thighs and note the differences. Mark adjustments equally on both sides. Double-check your measurements before cutting or sewing.
Symmetry ensures your shorts look professional and fit well. Consistency in marking leads to better results.
Cutting Excess Fabric
Shorts can often be too loose around the thighs. Cutting excess fabric is a simple solution. This method allows for a custom fit. Follow the steps below for best results.
Safety Tips
Safety is crucial when using scissors or a rotary cutter. Always use sharp and clean tools. Dull tools may cause uneven cuts and injury.
- Use a cutting mat: Protect surfaces and maintain control.
- Wear protective gloves: Prevent accidental cuts.
- Keep your workspace well-lit: Ensure you see every detail.
Maintaining Even Edges
Maintaining even edges is essential for a polished look. Uneven cuts can ruin the shorts. Follow these tips:
- Measure and mark: Use a fabric pen to mark the desired cut line.
- Use a ruler: Ensure straight lines by guiding your scissors or cutter.
- Cut slowly: Take your time to avoid mistakes.
| Tool | Purpose |
|---|---|
| Scissors | Cutting fabric along marked lines |
| Rotary Cutter | Making smooth and precise cuts |
| Fabric Pen | Marking cut lines on fabric |
| Ruler | Ensuring straight cuts |
By following these tips, you can ensure a perfect fit for your shorts. Happy crafting!
Sewing Techniques
Making shorts smaller around the thighs can be a fun DIY project. Using sewing techniques, you can achieve a perfect fit. This guide will cover two main methods: hand stitching and using a sewing machine. Each method has its own benefits and can help you tailor your shorts to your liking.
Hand Stitching
Hand stitching is a simple yet effective method. You don’t need a sewing machine. Here are the steps to follow:
- First, turn your shorts inside out.
- Next, use a fabric marker to mark the area to be taken in.
- Then, thread a needle with a matching thread color.
- Start stitching along the marked line using a backstitch.
- Continue stitching until you reach the end of the marked area.
- Tie off the thread securely to avoid unraveling.
- Finally, turn the shorts right side out and try them on.
Hand stitching is ideal for small adjustments. It allows you to take your time and ensure precision.
Using A Sewing Machine
Using a sewing machine is faster and provides a cleaner finish. Follow these steps for machine sewing:
- Turn the shorts inside out.
- Use a fabric marker to outline the area to be taken in.
- Pin along the marked line to hold the fabric in place.
- Set up your sewing machine with a matching thread.
- Sew along the marked line, removing pins as you go.
- After sewing, trim any excess fabric.
- Turn the shorts right side out and try them on.
Using a sewing machine ensures strong, durable seams. It is excellent for larger adjustments.
| Method | Pros | Cons |
|---|---|---|
| Hand Stitching | Simple, no machine needed | Time-consuming |
| Using a Sewing Machine | Quick, strong seams | Requires a sewing machine |
Both methods are effective. Choose the one that suits your needs and skills. Happy sewing!
Creating A Hem
Making shorts smaller around the thighs can be easy. Creating a hem is a great way to do it. You can use different methods to make a neat hem.
Double Folding Method
The Double Folding Method is simple. It gives a clean and strong finish.
- Step 1: Measure the amount you want to take in.
- Step 2: Fold the fabric once to the inside.
- Step 3: Fold it again to hide the raw edge.
- Step 4: Pin the fold in place.
- Step 5: Sew along the edge of the fold.
Using Hem Tape
Hem tape is a quick way to make shorts smaller. It does not need sewing.
- Step 1: Measure how much to take in.
- Step 2: Cut the hem tape to the needed length.
- Step 3: Place the tape inside the fold.
- Step 4: Iron the fold to activate the tape.
- Step 5: Let it cool to set the hem.
Both methods are easy and effective. Choose the one that fits your needs best.

Adding Elastic Bands
If your shorts are too loose around the thighs, adding elastic bands can help. This method is easy and quick. It offers a snug and comfortable fit. Here’s how you can do it.
Choosing The Right Elastic
First, choose the right elastic. Elastic bands come in various widths and strengths. For thigh areas, a 1-inch wide elastic band works best. It provides enough tension without being too tight.
Measure your thigh where the shorts feel loose. Cut the elastic band to this length. Add an extra inch for sewing. Use elastic with good stretch and recovery for the best fit.
Securing The Elastic
Next, secure the elastic to your shorts. Turn your shorts inside out. Identify the area where you want to add the elastic.
Follow these steps:
- Mark the start and end points on the shorts.
- Pin the elastic to these points.
- Sew the elastic band to the shorts using a zigzag stitch.
Ensure the elastic is evenly distributed. Stretch the elastic as you sew. This ensures it fits properly once worn.
To finish, turn the shorts right side out. Try them on to check the fit. Adjust if necessary by tightening or loosening the elastic.
Add elastic bands to make shorts smaller around the thighs. This method is efficient and budget-friendly. Your shorts will fit better and feel more comfortable.
Finishing Touches
You’ve taken steps to make your shorts smaller around the thighs. Now, it’s time for the final touches. These steps ensure your shorts look neat and fit perfectly.
Ironing The Seams
Once you have sewn the new seams, it’s important to iron them. This helps the fabric lay flat and look professional. Use a hot iron, but be careful with delicate fabrics.
- Set your iron to the appropriate heat setting.
- Place the shorts on an ironing board.
- Press the seams flat with the iron.
Ironing the seams also sets the stitches, giving your shorts a polished finish. A flat seam makes the shorts more comfortable to wear.
Inspecting For Flaws
After ironing, inspect your shorts for flaws. Check the seams to ensure they are even and straight. Look for any loose threads or missed stitches.
- Turn the shorts inside out.
- Examine each seam closely.
- Trim any loose threads with scissors.
If you find any issues, fix them right away. This might involve re-sewing a seam or trimming excess fabric. A thorough inspection ensures your shorts are perfect and ready to wear.
| Step | Action |
|---|---|
| Ironing | Press seams flat with a hot iron. |
| Inspecting | Check for flaws and fix them. |
These finishing touches make a big difference in how your shorts fit and look. Take your time to ensure every detail is perfect.
Trying On The Shorts
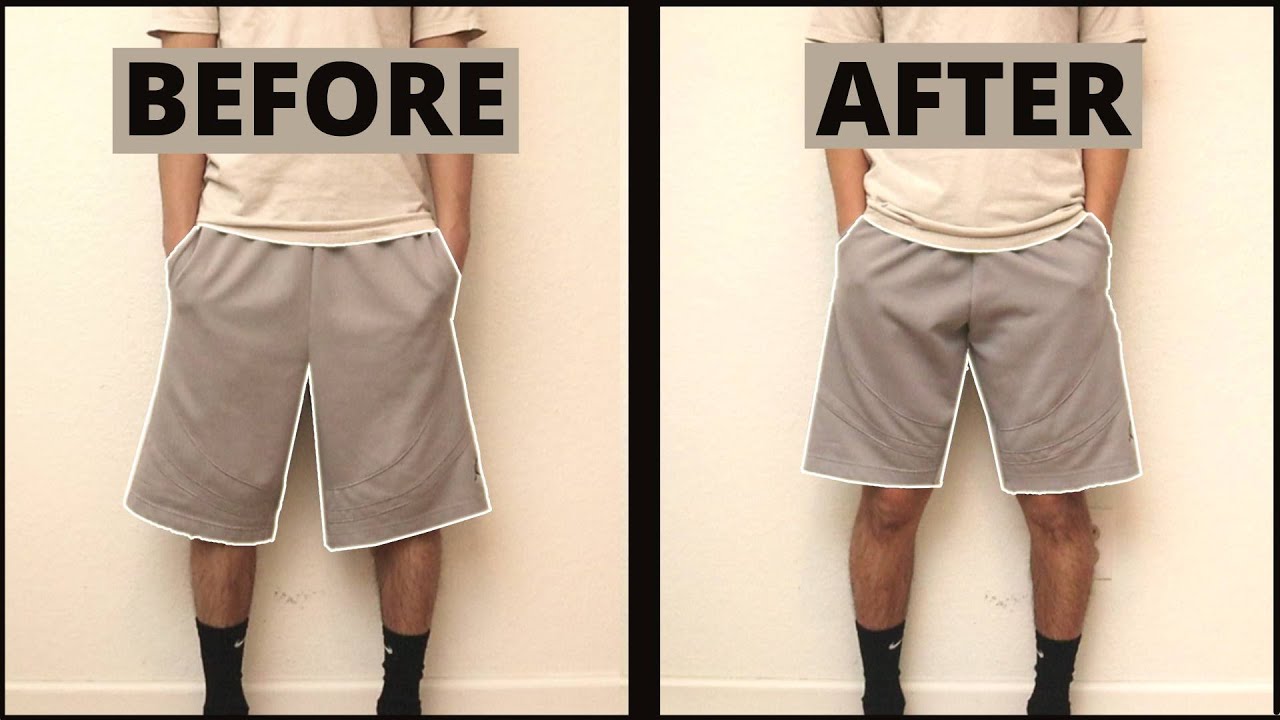
Trying on your shorts is the first step. This helps you see what needs fixing. You’ll know if the shorts are too loose or too tight. Pay close attention to the fit around your thighs.
Checking The Fit
Check if the shorts fit well around your waist. They should not slide down. Look closely at the thigh area. Is it too baggy? If yes, you need to make adjustments. Walk around to see if the shorts stay in place. Sit down and stand up. This helps you know if they are comfortable.
Making Final Adjustments
Now it’s time to make the final adjustments. Gather your tools. You will need a needle, thread, and scissors. Turn the shorts inside out. Pinch the fabric along the inner thigh seam. Use pins to hold the fabric in place.
Stitch along the pinned line. Use small, tight stitches. This will make the shorts smaller. Cut off the extra fabric. Turn the shorts right side out. Try them on again. Check if the fit is now perfect. If not, repeat the steps until satisfied.
Alternative Methods
Need to make your shorts smaller around the thighs? You don’t always need a sewing machine. Here are some alternative methods you can use to achieve a better fit. These methods are quick, easy, and perfect for those who want a DIY solution.
Using Fabric Glue
Fabric glue can be a quick fix to make shorts tighter. Follow these steps:
- Turn the shorts inside out.
- Pinch the fabric on the inner thigh.
- Apply fabric glue along the pinched area.
- Press the fabric together and let it dry.
This method is great for those who want a permanent solution without sewing.
Employing Safety Pins
Safety pins offer a temporary way to adjust the fit. Here’s how:
- Turn the shorts inside out.
- Pinch the fabric on the inner thigh.
- Use safety pins to secure the pinched fabric.
- Turn the shorts right side out and try them on.
This method is useful for a quick fix and is easy to undo.
Caring For Your Altered Shorts
After altering your shorts, proper care is essential. This ensures they last longer and maintain their shape. Follow these simple tips to keep your shorts in great condition.
Washing Tips
- Use cold water: Cold water helps prevent fabric shrinkage.
- Turn them inside out: This protects the altered seams.
- Use gentle detergent: Gentle detergent keeps the fabric soft.
- Air dry: Avoid using the dryer. Lay them flat to dry.
- Avoid bleach: Bleach can weaken the fabric and damage the alterations.
Storage Recommendations
Proper storage keeps your shorts in good shape. Follow these tips for best results:
- Fold neatly: Avoid creases by folding them carefully.
- Use hangers: Hanging shorts prevents wrinkles and maintains their shape.
- Avoid crowded spaces: Give them room to breathe in your closet.
- Keep away from direct sunlight: Sunlight can fade the fabric over time.
- Use storage bags: Protect your shorts from dust and pests.
Frequently Asked Questions
How To Make Shorts Tighter At The Thighs?
To make shorts tighter at the thighs, sew darts inside the thigh area. Alternatively, use fabric glue to create a tighter fit.
How Do I Keep My Shorts From Riding Up My Big Thighs?
Choose shorts with a longer inseam and stretchy fabric. Opt for styles with silicone grippers or inner liners. Apply anti-chafing products or wear compression shorts underneath. Ensure a proper fit to reduce movement.
How Do I Make My Shorts Smaller?
To make your shorts smaller, wash them in hot water and then dry them on high heat. You can also tailor them by sewing.
How Do You Hide Big Thighs In Shorts?
Choose high-waisted shorts for a flattering fit. Opt for darker colors and vertical stripes to slim your thighs. Select A-line or loose-fitting shorts for better coverage. Pair with longer tops to create balance. Avoid tight, clingy fabrics.
How To Reduce Thigh Size In Shorts?
To reduce thigh size in shorts, sew a smaller seam or use fabric tape to adjust the fit.
Conclusion
Achieving the perfect fit for your shorts is easier than you think. Use simple techniques to adjust the thigh area. Customizing your clothes can boost comfort and confidence. Remember, a well-fitted pair of shorts enhances your style. Try these tips and enjoy better-fitting shorts today!